How to create a pressure sensitive custom brush in Adobe Illustrator
How to guide - Creating a pressure sensitive custom brush in Illustrator
In this how to course we’re going to cover how you go about creating a pressure sensitive calligraphic brush in illustrator, that will allow you to have complete control over your line weights when drawing with a graphics tablet. Whether you want to create more depth or just play around this brush is perfect for giving you the variation of ink in a digital format.
Step 1 – Create new brush
Navigate to the brushes palette in Adobe Illustrator (Window>Brushes) or F5. One the brushes panel is open move your cursor to the upper right and click the small menu line icon. Then click new brush to create a new custom brush.
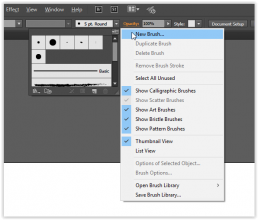
Step 2. Select Calligraphic Brush
A menu will appear pop up titled ‘new brush’ where you can select a brush type – select the top option ‘Calligraphic Brush’
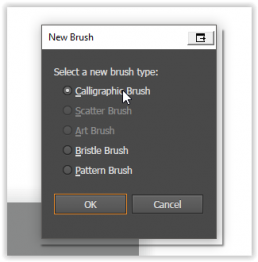
Step 3. Select pressure from the size drop down menu
Next to the size option at the bottom where the slider is you will see the word ‘fixed’ select this and from the drop down select ‘pressure’
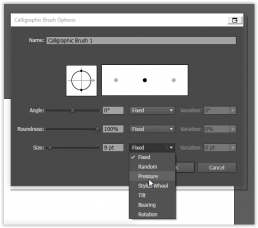
Step 4 – Change the variation
Alter the variation of the size to the right hand side of the drop down. Remember that the more variation between the initial brush size and this value will create more pressure variation to the line weight when using your tablet to draw.
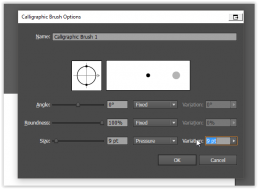
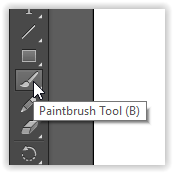
Step 5 – Select the paintbrush tool
After accepting the creation of your custom brush make sure that the Paintbrush tool is selected. (You can also use the blob tools and other tools in unison with your new pressure brush)
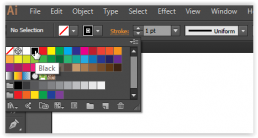
Step 6. Select your stroke colour
You can now select the colour you want to use for your brush, in this instance I’m selecting black. You don’t need to alter the stroke weight as this will be done my the pressure sensitivity of your tablet in this instance.
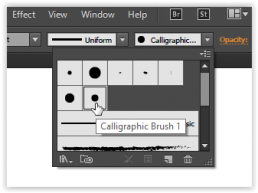
Step 7. You can view and edit your brush at any time
Now you’ve created your brush you will be able to see it in the brushes menu. You can double click and change the values of the brush at any time and this can be applied to only new strokes or retroactively applied to lines you’ve already drawn with the pressure sensitive calligraphic brush.
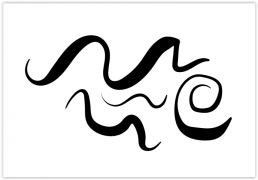
Step 8. Draw till your hearts content
You’ve now created a pressure sensitive brush in illustrator that will work in unison with your graphics tablet to work the way a real calligraphic brush does. This will give you great freedom over line weight and can really make your artwork pop. The variations and uses are limitless.
For the purposes of this tutorial I used a copy of Adobe Illustrator and a Wacom Bamboo tablet. They’re available on amazon and aren’t the top of the line but durable, usable and responsive. I’d highly recommend checking one out if you’ve ever been curious about using a tablet.
